IRON NEST: Heavy Turret Simulator Physical Gun Controls
Traverse, elevation, shell selection, ramming, and powder charges —every handwheel in the cab explained.
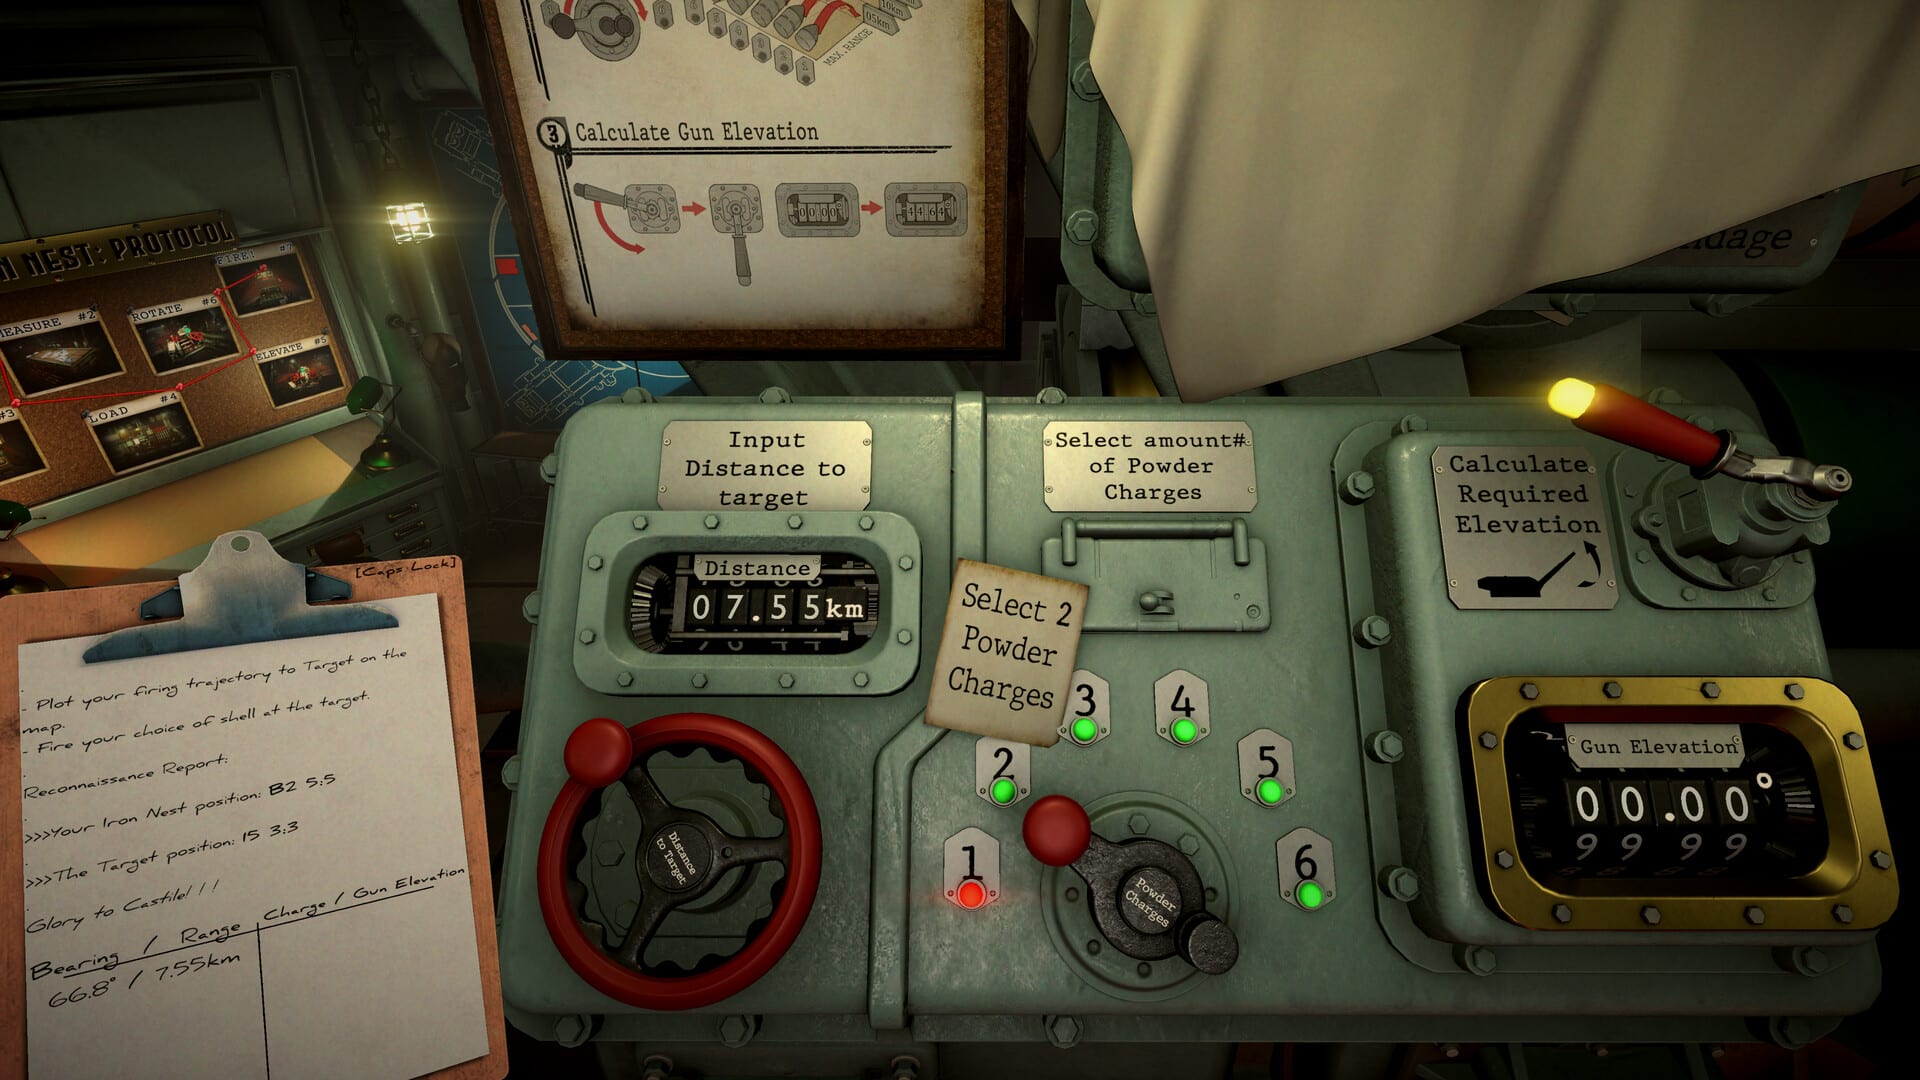
The Iron Nest turret is operated the way a historical crew would run a fixed heavy battery: you grab handwheels, pull loading levers, and read gauges —not drag a mouse across an abstract crosshair. Physical gun controls are the heart of IRON NEST, and most demo players who struggle with accuracy are fighting the procedure rather than the ballistics.
This page covers traverse and elevation wheels, the loading platform sequence, powder charge levers, and the habits that keep left and right guns independent. Read Default Keybinds first for keyboard shortcuts, then return here before your first live fire mission. The Getting Started guide places these steps inside the full order-to-impact loop.
Before you touch the wheels
Physical controls only matter after map work is done. You should already have bearing and range on the clipboard from a red pencil line —see Map Console Tools —and confirmed powder charge from the ballistic calculator with Enter. Loading the wrong shell or charge before laying the gun means repeating the entire platform sequence.
Shell choice is documented on the Shell Tier List and individual ammunition pages. Powder charge sets range; shell type sets effect. Both are dialed on separate physical systems.
Traverse (horizontal laying)
Traverse moves the barrel in azimuth so the muzzle points at the bearing copied from the map.
- Locate the traverse handwheel on the laying station for the active gun.
- Left-click and hold on the wheel —the same grab action documented in Default Keybinds.
- Drag to rotate until the traverse indicator matches your clipboard bearing.
- Release and verify against the calculator readout before moving to elevation.
Traverse is sensitive to clamp settings. With Clamp mouse to valves enabled, the cursor stays on the wheel during long rotations, which prevents overshoot on bearings near grid edges.
Dual-gun missions require independent traverse settings per barrel. Complete one gun’s laying before switching sides so you do not mix clipboard entries.
Elevation (vertical laying)
Elevation sets the barrel angle for the range and powder charge pair the calculator returned.
- Move to the elevation handwheel adjacent to the traverse control.
- Grab with LMB and drag until the elevation dial matches the calculator solution.
- Cross-check the gun calculator instrument if the mission provides a secondary confirmation step.
Elevation interacts with powder charge: the firing table gives charge brackets for range bands, but the live calculator resolves the exact angle. Do not guess elevation from memory —demo operations punish small errors with wide misses on the 20×10 grid.
Loading platform —left to right workflow
The gun loading platform sits to the right of the ballistic calculator console. Work it left to right every time so you never skip a step:
Step 1 —Select shell
Pull the lever beneath the Shell Selector System Pressure gauge until the requested shell type sits at the front of the magazine position. The selector displays available types including HE, AP, HCHE, smoke, star, and specialty rounds —see Ammunition hub for role breakdowns.
Match High Command when the teleprinter specifies a shell. When orders leave choice to you, use Shell Tier List rather than defaulting to HE every mission.
Step 2 —Ram shell
Pull the handle below the Shell Rammer System Pressure gauge to the right. This rams the selected round into the chamber. Wait for pressure gauges to stabilize before adding powder —ramming with a mis-selected shell wastes requisition and forces an unload cycle.
Step 3 —Dispense powder charges
Each of the six levers beneath the Powder Charges System Pressure/Storage gauges represents one charge. Pull down the number of levers matching your calculated charge (one through six for the standard range table). Total loaded charges must equal the calculator output exactly.
Powder charge is shell-agnostic: the same charge table applies to AP and HE alike. Only effect and blast radius change with shell type.
Step 4 —Engage loading bridge and lock chamber
Later operations add explicit bridge and breech steps. Treat any red-highlighted lever as mandatory —if the gun refuses to fire, walk the platform again left-to-right before blaming bearing.
Unloading and corrections
Wrong shell or charge means reversing the platform sequence: vent pressure safely, withdraw charges, rammer reverse if available, and re-select. Speed comes from repetition, not skipping verification.
After observed impact, adjust range or bearing on the map with yellow pencil support lines, then update traverse and elevation —not the loading sequence unless charge or shell role changes.
Gauge reading habits
Pressure gauges on the selector, rammer, and charge systems are not decorative. If a lever feels stuck, check whether the previous step left pressure in the wrong line. Forcing handles damages nothing in-game, but it wastes mission time you cannot recover on counter-battery timers.
Dual-gun coordination
When both barrels are mission-active:
- Complete loading and laying for gun one before starting gun two unless the briefing explicitly sequences simultaneous fire.
- Keep clipboard sides separated (Default Keybinds —Tab).
- Traverse and elevation wheels are per-gun —do not assume setting one barrel mirrors the other.
Physical controls vs keyboard
| Task | Input |
|---|---|
| Grab handwheel | LMB hold + drag |
| Pull loading lever | LMB on lever stem |
| Confirm calculator | Enter (keyboard) |
| Toggle map / interact | E (keyboard) |
The split is intentional. Gun laying stays tactile; confirmations stay keyboard-driven so you do not accidentally rotate a wheel when meaning to accept a value.
Practice drill (demo-safe)
- Load EMPTY or practice shell if available.
- Set traverse to a known bearing from training briefing.
- Match elevation to calculator output.
- Walk away and return —re-verify dials before firing.
- Repeat on the opposite gun if dual-barrel tutorial is unlocked.
Related pages
- Controls hub —full controls overview
- Default Keybinds —E, F, G, Enter, Tab, LMB
- Map Console Tools —bearing and range before laying
- Armor-Piercing Shells —when AP loading matters
- High-Explosive Shells —everyday HE and HCHE loads
- Guides hub —mission walkthroughs and demo tips
Frequently Asked Questions
Quick answers to the most common questions.
Why will my shell not ram into the chamber?
Confirm the shell selector shows the intended type and the rammer gauge has cleared from any previous cycle. Work the platform left to right without skipping the selector step.
Do traverse and elevation use the keyboard?
No. Both are physical handwheels operated with left-click grab and drag. Keyboard keys handle interact, confirm, and clipboard only.
How many powder charge levers can I load?
Six levers map to charges one through six on the standard range table. Match the count to your ballistic calculator output for the target range band.